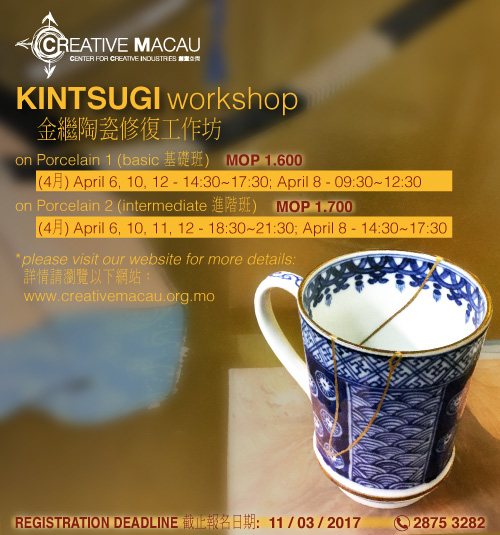
KINTSUGI on Porcelain 1 Basic Level
April 6 – 12. 2017
Class Schedule:
6th, 10th, 12th from 14:30 to 17:30;
8th (saturday) from 09:30 to 12:30
Duration: 4 Days, 12 hours in total
Max. 10 pax/class
Fees: Mop 1.600
including 1 basic Tool kit (Mop 250) + 1 silver leaf + glass plate
KINTSUGI on Porcelain 2 Intermediate Level
April 6 – 12. 2017
Class Schedule:
6th, 10th, 11th, 12th from 18:30 to 21:30;
8th (saturday) from 14:30 to 17:30
Duration: 5 Days, 15 hours in total
Max. 10 pax/class
Fees: Mop 1.700
including 1 intermediate Tool kit (Mop 350) + 1 silver leaf + glass plate
Instructor: Kristina Mar – http://www.kristinamar.com
Language: English, Portuguese, Japanese
Registration & Class Venue:
CREATIVE MACAU – Center For Creative Industries
G/F Macao Cultural Centre Building, Xian Xing Hai Avenue
Mon – Sat, 2pm-7pm
tel: 2875 3283
email: cci@creativemacau.org.mo
Registration Deadline:
20 March, 2017
REMARKS:
ATTENDANT who already has the tools, can pay Mop1,350 instead.
HOWEVER, if you need any of the following item, please pay upon REGISTRATION:
. gold powder flake (pearl mother) 10g (MOP50)
. gold leaf 10 pcs (MOP500)
. silver leaf 10 pcs (MOP200)
. gold powder 4g (MOP700)
. silver powder 4g (MOP400)
. glass urushi 50g (MOP250)
. Ki urushi 50g (MOP150)
. bamboo pincer for handling gold and silver leaf (MOP80)
*ATTENDANTS should bring the following items (that can be purchased at at any stationary shop):
. medical gloves and masks;
. turpentine (to dissolve the lacquer)
. solvent (to remove extra glue or lacquer)
. cotton swabs/buds and cotton balls
. toothpicks
. a hand towel per 1 object (it will be wet and placed in the box to give moisture to the lacquer of the amended object)
. 1 box per object (with same size of the object)
. masking tape (to hold the broken pieces after glued)
. disposable wooden chopsticks or plastic straws
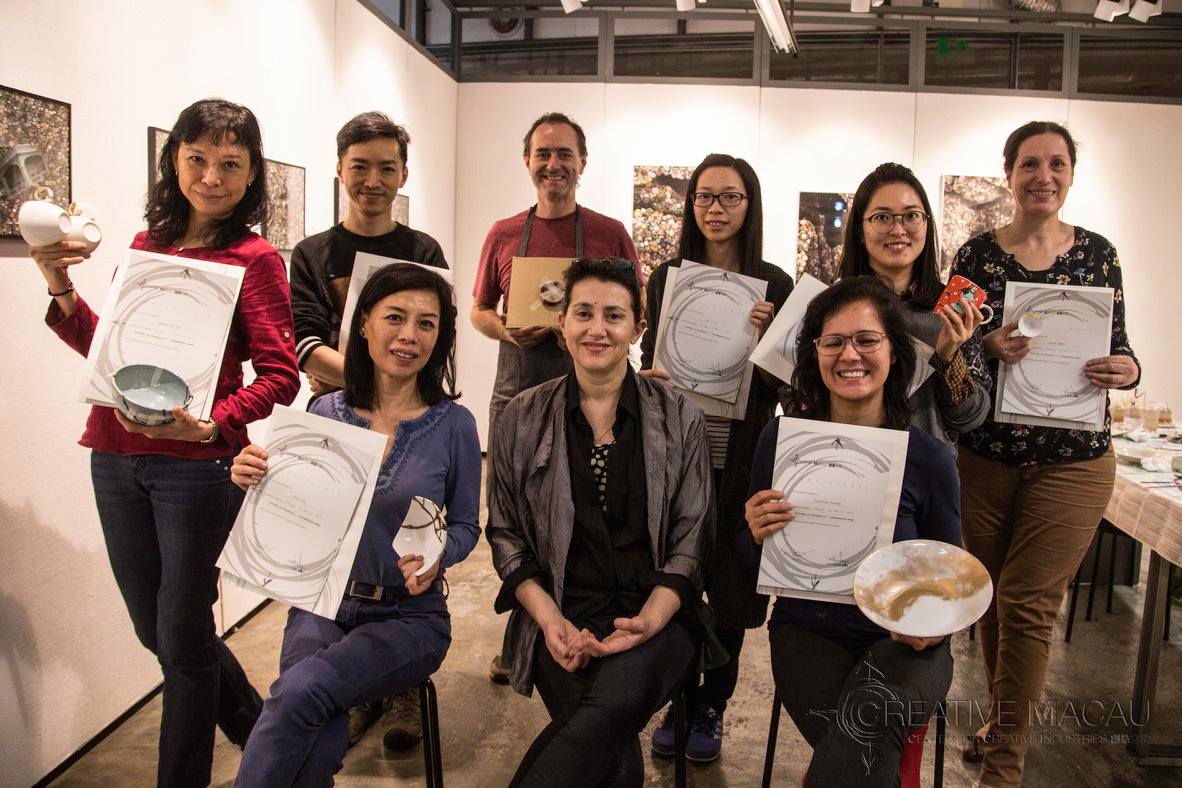
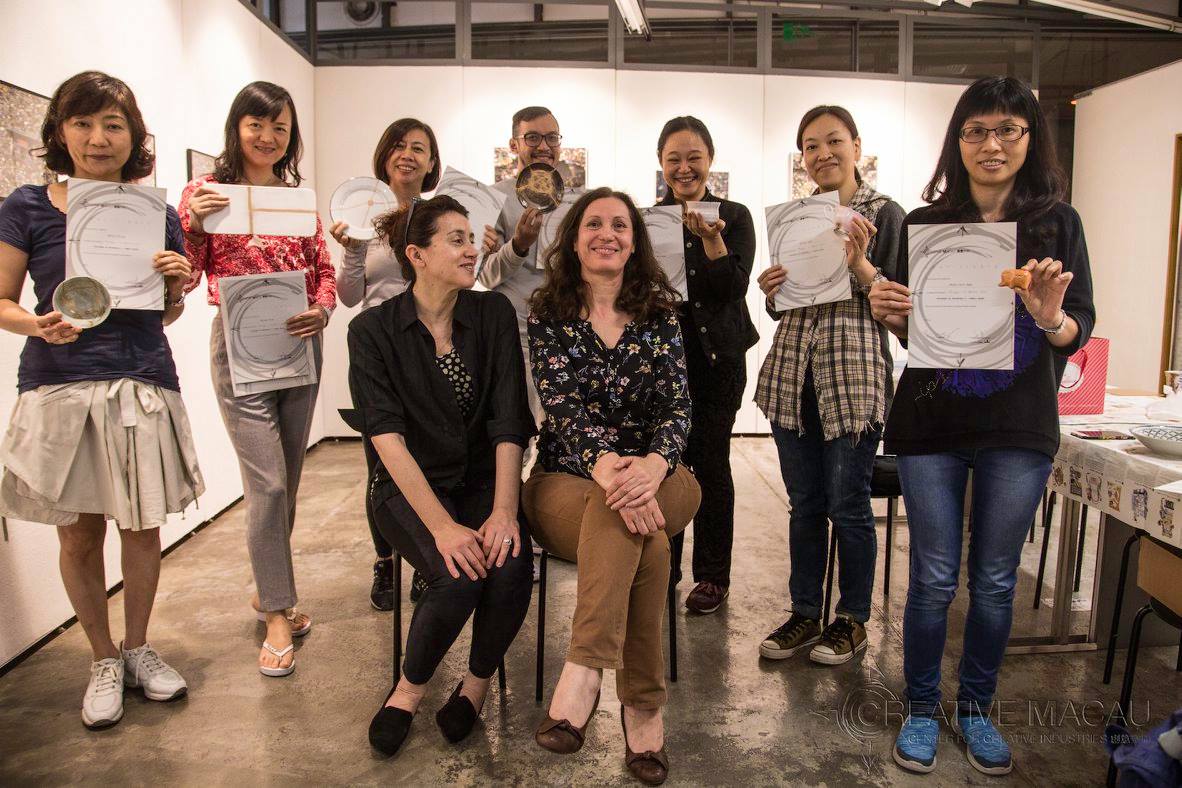
A certificate will be issued to participants with 80% attendance.
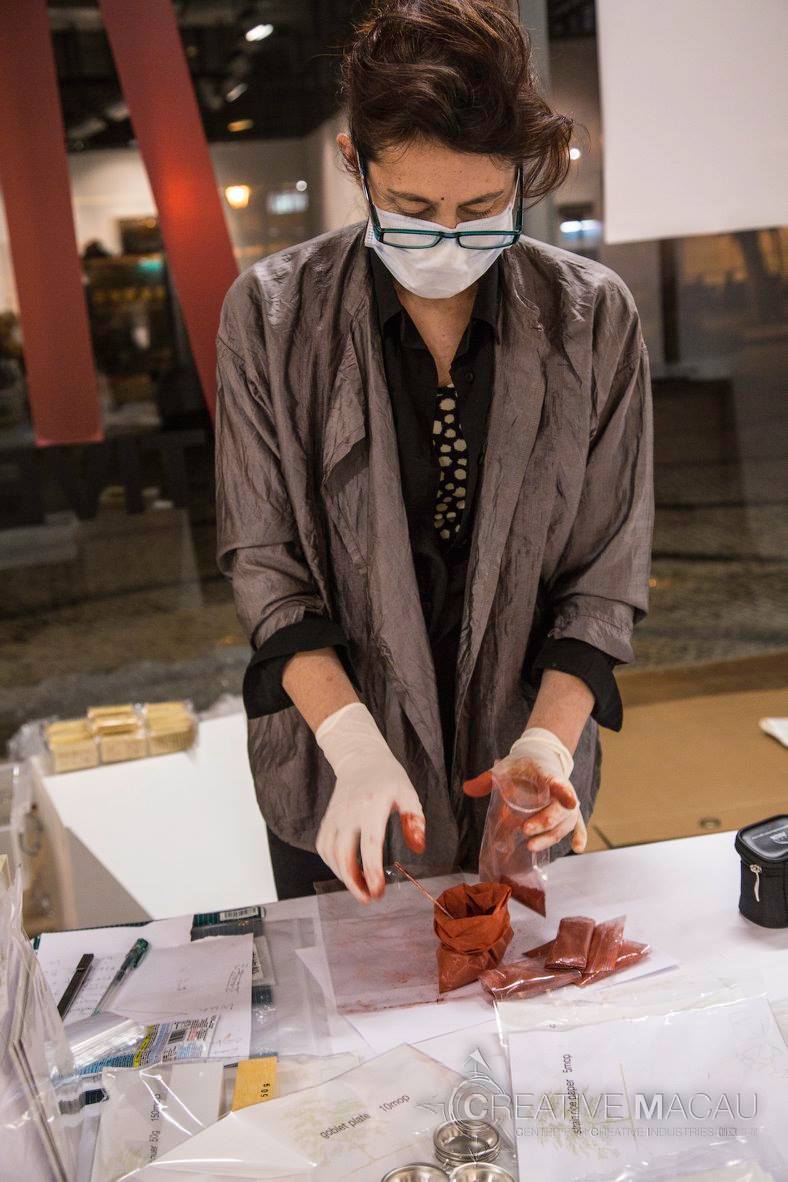
Kintsugi or literally golden joinery repair is the Japanese art of repairing broken pottery with lacquer dusted or covered with powdered gold, silver, or platinum. It is the art of embracing damage as a philosophy, it treats breakage and repair as part of the history of an object, rather than something to disguise. As this ancient technique developed it became a form of art for itself. Because of the delicate and meticulous technique, or because philosophical concepts applies to its basics that repair ads history and beauty to a piece, a image applied to ones life itself.
In this course participants will bring a broken vessel to mend or join with Japanese lacquer, and covering it finally with gold and silver powder or leaf. Attendants must bring their own broken or damage object to mend or new one to alter . Kintsugi technique also can be applied to an undamaged object therefore that may be transformed into a new design pattern as a piece of art.
Basic Porcelain 1
DAY 1
– Slide show
– Introduction to japanese lacquer Urushi : Applications, possibilities and restrictions. Introduction talk for beginners in kitsugi techniques and basic concepts about japanese lacquer techniques
– Personal projects discussion and prepare personal objects for mending.
Start mending personal objects.
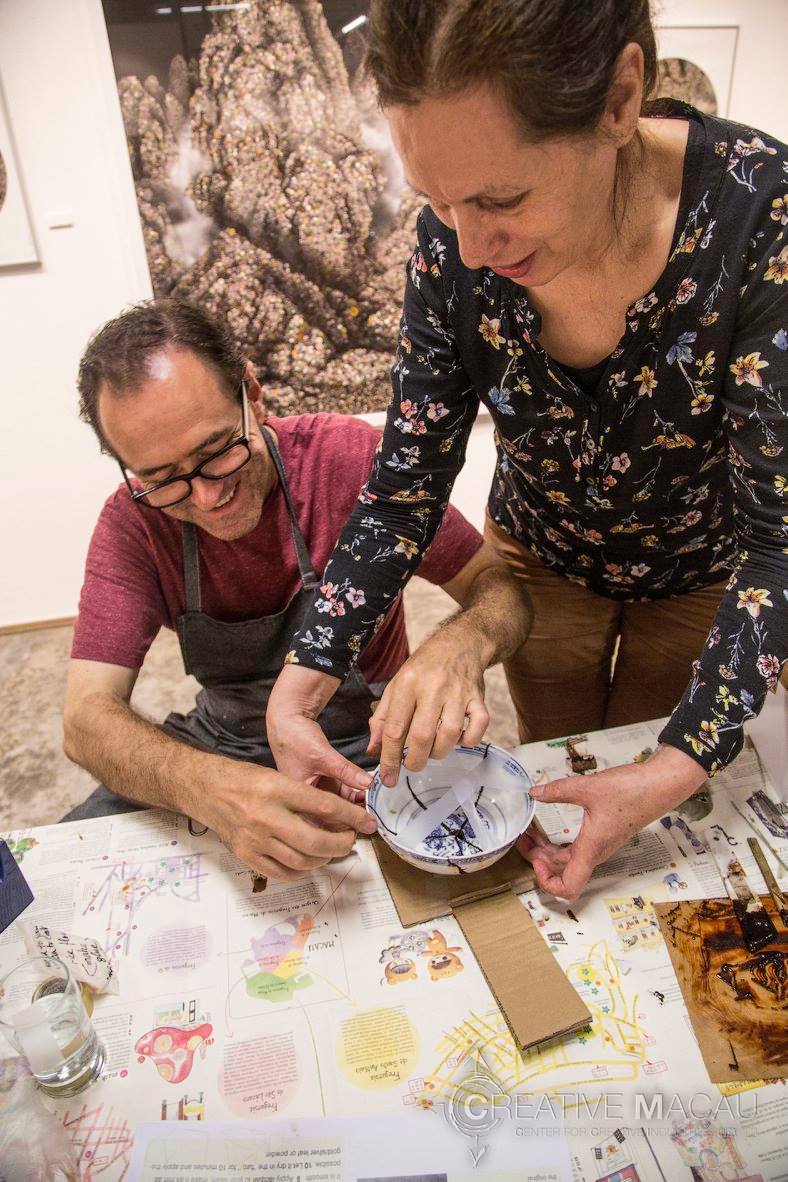
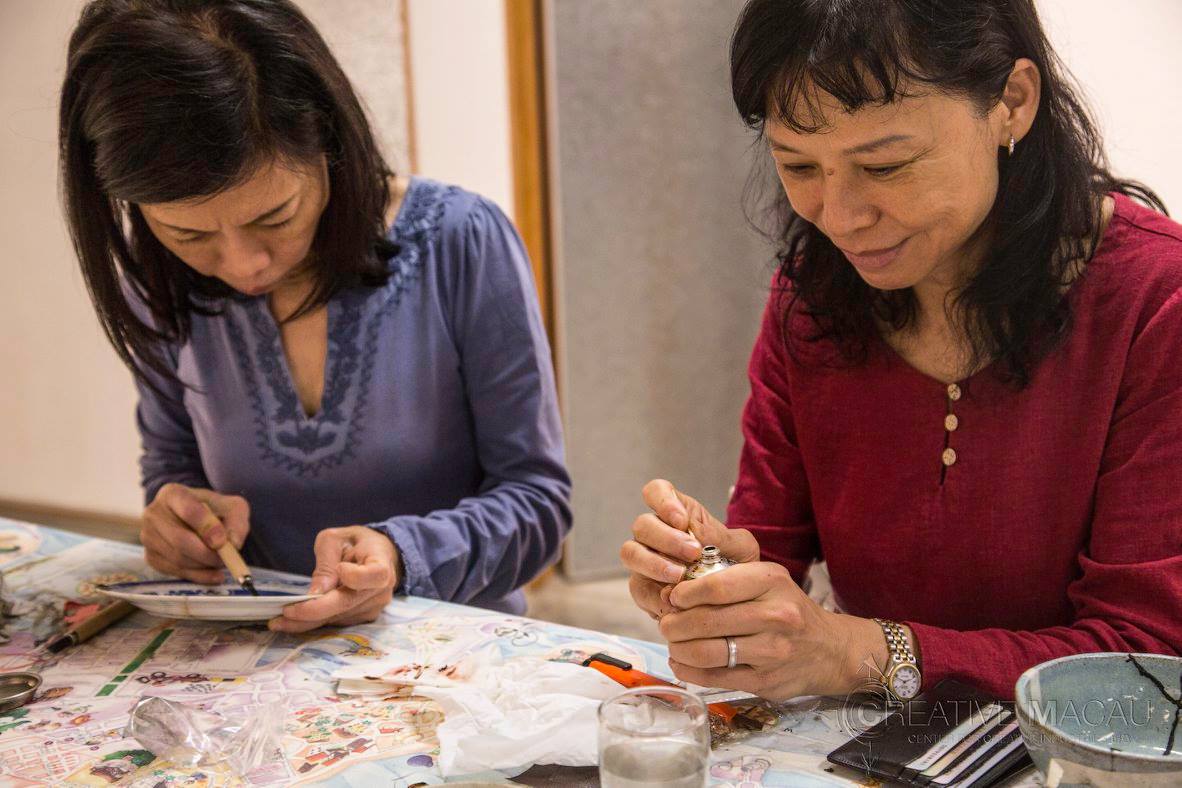
1.Study the pieces to evaluate the damages and decide carefully the amount of intervention with glues and lacquer. Antiques, casual daily use items , emotional valued items and items to transform with creative proposes have different issues to considerer and approaches to repair. This phase is very important as this decisions will became aesthetically very much also a part of the repaired piece.
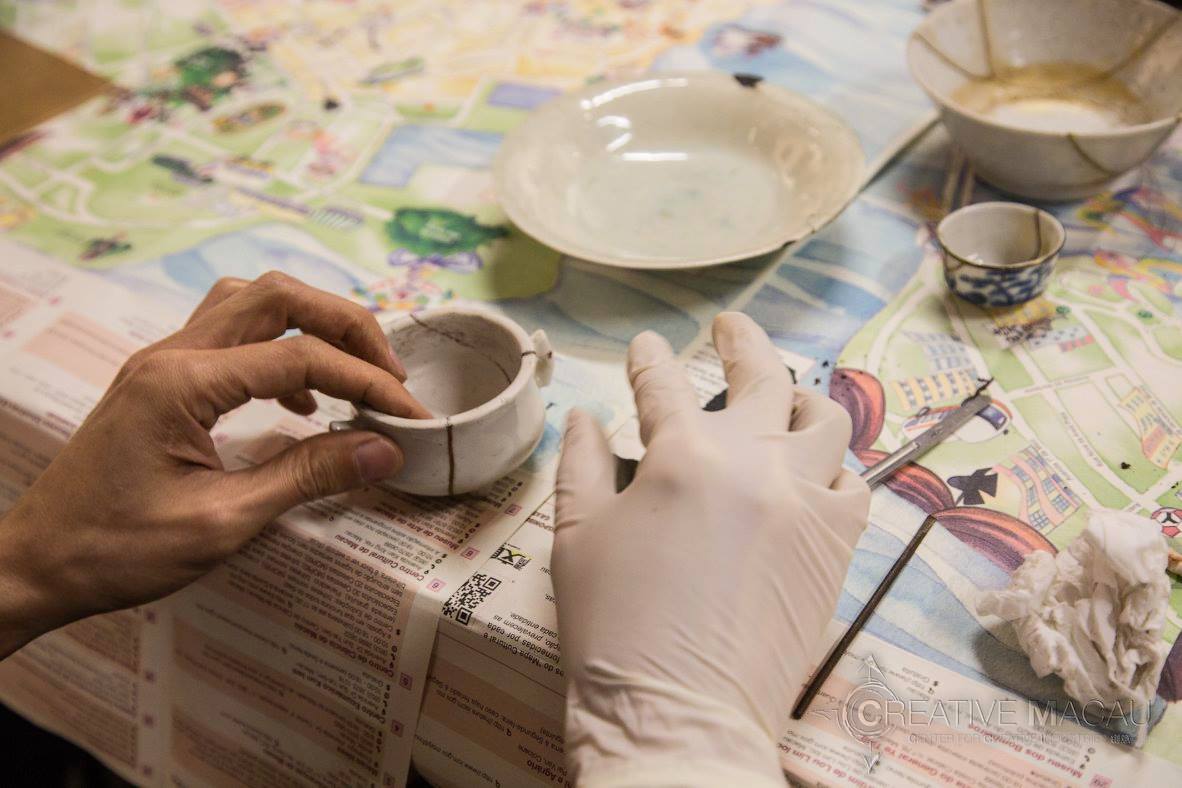
2.cleaning and preparing the pieces and start the first joining.
This joining will be the “scar” that will be later covered with gold silver or red urushi lacquer. This phase is the most important as will decide the final shape that your piece will be stand like. Be aware that works with many small parts are difficult to joint in a sole class. Please avoid very complex damaged pieces, as you should only be able to joint 3 or 4 pieces at maximum ,per class, for a better result in structure issues.
3. prepare the pieces to harden in a paper box with a hot and humid environment. Please bring a paper or carton box , that covers your piece completely , (big enough for not touching it) and a hand towel to wet and keep the inside of the box moisturised. That box, will be your little “sauna” or “muro” to keep and protect your work until the end of the course.
DAY 2
1.Continuing fixing the joints .
2. Prepare the works for harden in their respective boxes or “muro”
DAY 3
1. Finish and polish the mending areas with sand paper, and cutters .This phase will be very important as will decide how detailed or perfect you can get for the final appearance of your work. Here as lacquer or epoxy resins harden you will scratch the excess and polish the areas fixed for the final apply of the gold, silver or red lacquer.
DAY 4
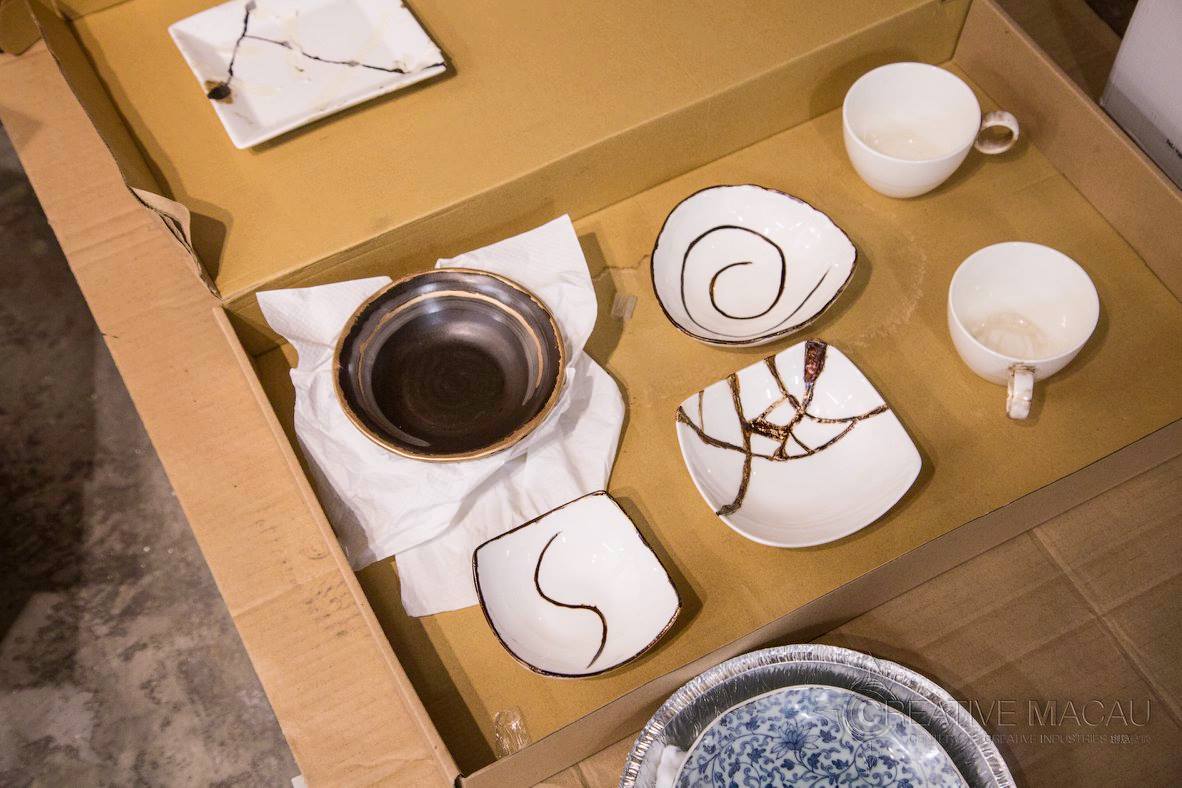
1.Final polishing .Covering with fine lines the previous “scar” or mended areas with lacquer. Finally apply the gold or silver powder , or leaf,and design the final composition.
As works are still to dry and harden please use the “muro” box to carefully transport your piece after the end of the course.
BASIC TOOL KIT INCLUDES
– 1 tube of Japanese natural lacquer (ki urushi)
– 1 tube of epoxy resin
– 10g gold powdered shell (not real gold for practicing) that allows fixing an average piece of 20x20x20 cm.
– 1 liner brush
– 1 powder cleaning brush,
– 1 bamboo and 1 plastic spectula and paper for finish
– 1 goblet
Intermediate Porcelain 2
For kintsugi on Porcelain level 2, prior knowledge of mending with Urushi japanese lacquer, or skills on the fine art restoration field is advised.
DAY 1
– Slide show
– Discussion about japanese lacquer Urushi : New applications on porcelain, possibilities and restrictions. Focus on attention to details and issues of resistance and durability of the natural urushi laquer. Personal projects discussion and prepare personal objects for mending.
Start mending personal objects.
1.Study the pieces to evaluate the damages and decide carefully the amount of intervention with glues and lacquer. Antiques, casual daily use items , emotional valued items and items to transform with creative proposes have different issues to considerer and approaches to repair. This phase is very important as this decisions will became esthetically very much also a part of the repaired piece.
2.cleaning and preparing the pieces and start the first joining.
This joining will be the “scar” that will be later covered with gold silver or red urushi lacquer. This phase is the most important as will decide the final shape that your piece will be stand like. Be aware that works with many small parts are difficult to joint in a sole class. Please avoid very complex damaged pieces, as you should only be able to joint 3 or 4 pieces at maximum, per class, for a better result in structure issues.
3. prepare the pieces to harden in a paper box with a hot and humid environment. Please bring a paper or carton box , that covers your piece completely , (big enough for not touching it) and a hand towel to wet and keep the inside of the box moisturized .That box, will be your little “sauna” or “muro” to keep and protect your work until the end of the course.
DAY 2
Finish and polish the mending areas with sand paper, and cutters .This phase will be very important as will decide how detailed or perfect you can get for the final appearance of your work. Here as lacquer or epoxy resins harden you will scratch the excess and polish the areas fixed for the final apply of the gold, silver or red lacquer.
DAY 3
Final finish and polish the mending areas with sand paper, and fine charcoal abrasives .This phase will be very important as will decide how detailed or perfect you can get for the final appearance of your work.
DAY 4
Final polishing .Covering with fine lines the previous “scar” or mended areas with lacquer. Finally apply the gold or silver powder , or leaf,and design the final composition.
As works are still to dry and harden please use the “muro” box to carefully transport your piece after the end of the course.
INTERMEDIATE TOOL KIT
– 1 tube of Japanese natural lacquer for porcelain and glass (glass urushi)
– 1 tube of epoxy resin
– 10g gold powdered shell (not real gold for practicing) that allows fixing an average piece of 20x20x20 cm.
– 1 liner brush
– 1 powder cleaning brush,
– 1 bamboo and 1 plastic spectula
– sand paper for finish
– 1 goblet